Inserting a logo into the forum interface is one of the simple but effective ways to personalize and brand your forum. XenForo 2 provides an easy way to replace the default logo with your own. In this article, we will show you how to insert a logo into the XenForo 2 forum interface.

1. Prepare Your Logo
Before inserting a logo into XenForo, you need to prepare a logo image file. The most popular format is PNG because it supports transparent backgrounds, helping the logo display beautifully on any background color. The recommended size for a logo is around 200px (width) and 50px (height) to ensure the logo doesn’t take up too much space on the website.
Once you have your logo, upload the logo file to your server or use an image file URL from online image hosting services.
2. Upload Logo to Server
If you want to store the logo directly on your server, you can use the FTP protocol or your hosting’s file manager to upload the logo to the appropriate folder on the server. Usually, logos are stored in folders /styles/your-style/xenforo/.
You can also use the file download tool available on your hosting control panel. After downloading the file, remember the path to the file to use in the next step.
3. Install Logo On XenForo Interface
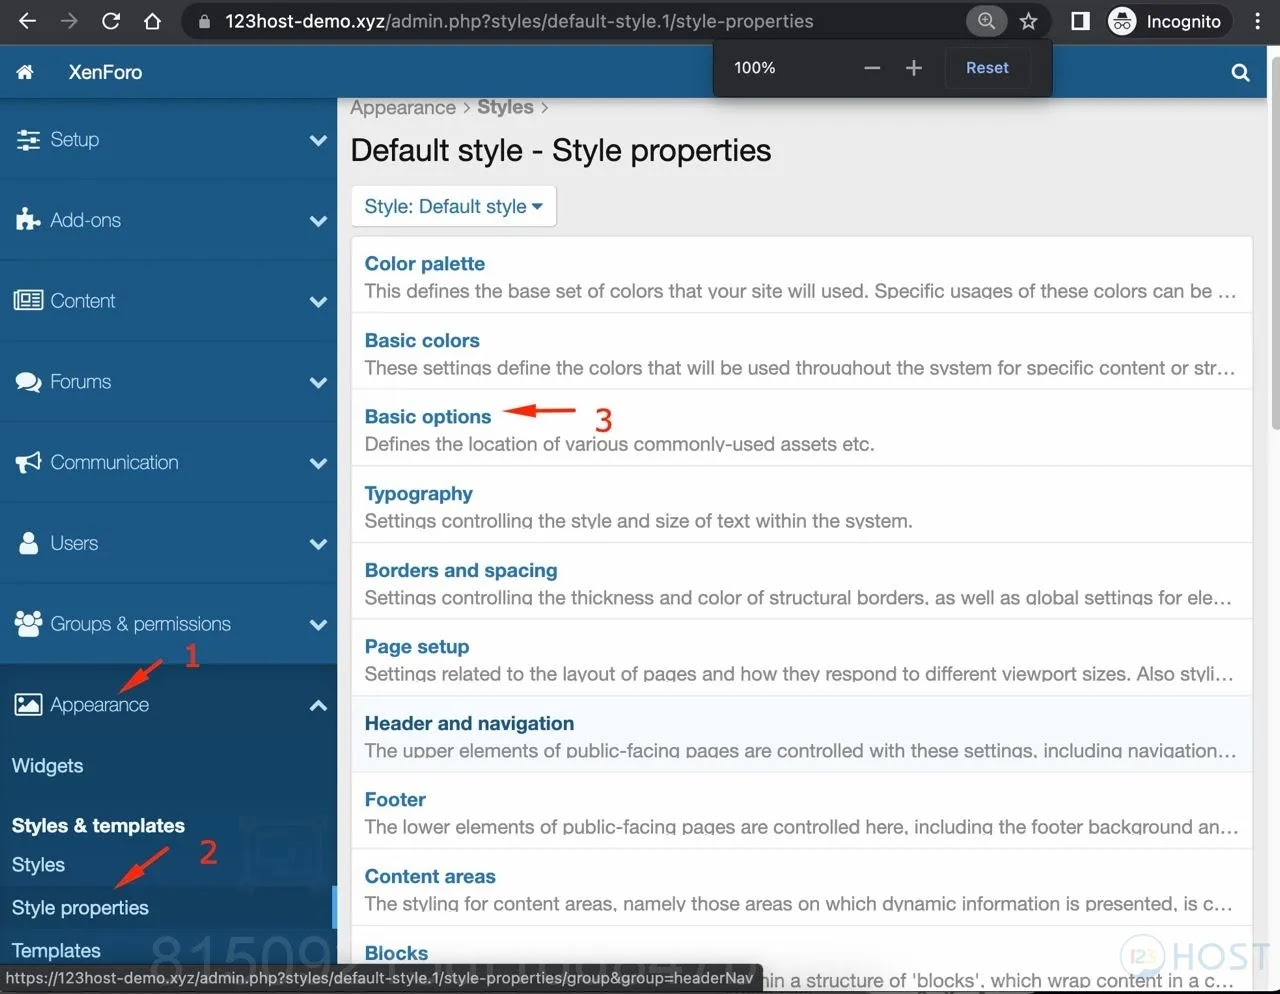
After uploading your logo to the server or getting its URL, you can change XenForo’s default logo with your own through the XenForo admin panel:
- Access the XenForo admin console.
- Go to Appearance > Styles.
- Select the look you want to edit (or create a copy to edit).
- In section Style Propertiesselect Headers and Navigation.
- In section Logo URLpaste the link to your logo. For example:
/styles/your-style/xenforo/logo.png - Press Save to save changes.
Immediately, your logo will be replaced with the default logo on the forum.
4. Edit Logo Size
After replacing the logo, you may need to adjust the size or position of the logo to fit the look and feel. You can do this in the CSS section of the theme:
- Go to Appearance > Styles.
- Select Style Properties > Headers and Navigation.
- Find item Height and Width to adjust logo size. For example:
.p-header-logo img { height: 50px; /* Chiều cao logo */ width: auto; /* Tự động điều chỉnh chiều rộng */} - Press Save to save changes.
You can adjust the height, width, or both so that the logo displays beautifully on the forum’s interface.
5. Check and Optimize Logo Display on Mobile Devices
To ensure your logo displays well on mobile devices, you should test the interface on multiple devices with different screen sizes. If your logo is too large or doesn’t display well on mobile, you can use CSS to optimize:
@media (max-width: 600px) {
    .p-header-logo img {
        height: 40px; /* Giảm chiều cao logo trên thiết bị di động */        width: auto;
    }
}
This helps the logo adapt to small screen sizes without affecting the overall look and feel.
Insert logo
Inserting a logo into the XenForo 2 interface helps your forum become professional and highly personalized. By following the steps above, you can easily change the default logo and optimize display on various devices. A logo is not only a brand recognition element but also helps enhance the user experience on your forum.
Hopefully this guide will help you successfully insert and customize a logo for the XenForo 2 forum. If you have any questions or problems, don’t hesitate to reach out for further support!

